1. Go to Omni-Channel Settings under Setup.
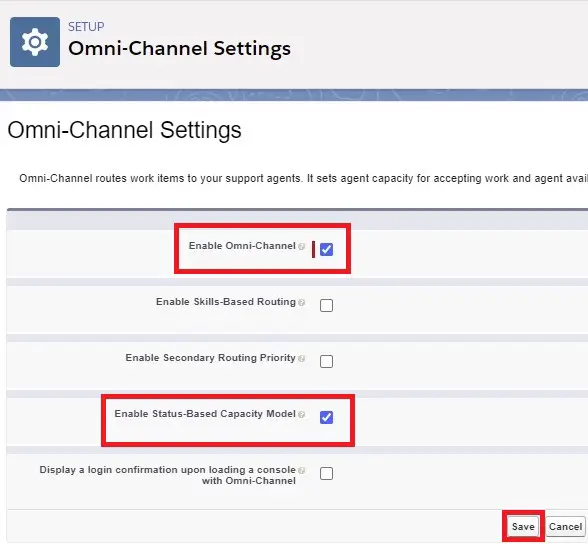
2. Select Enable Omni-Channel and Enable Enable Status-Based Capacity Model. Click Save button.
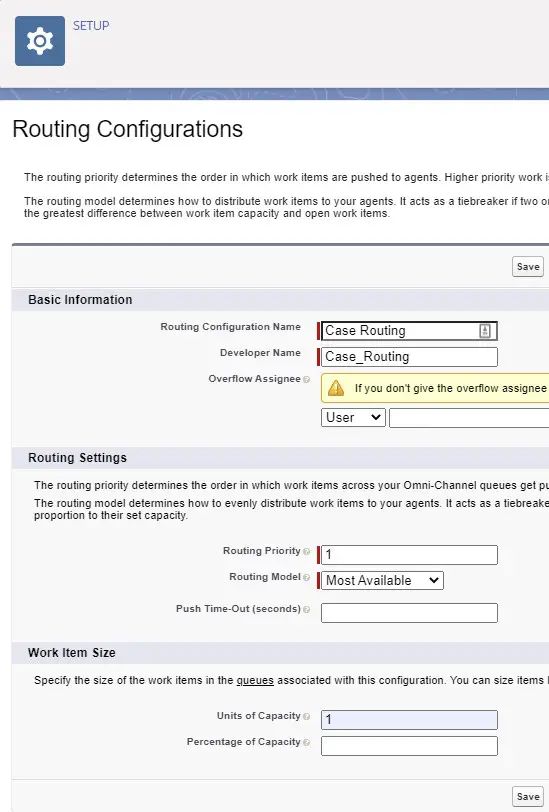
3. Create a Routing Configuration.
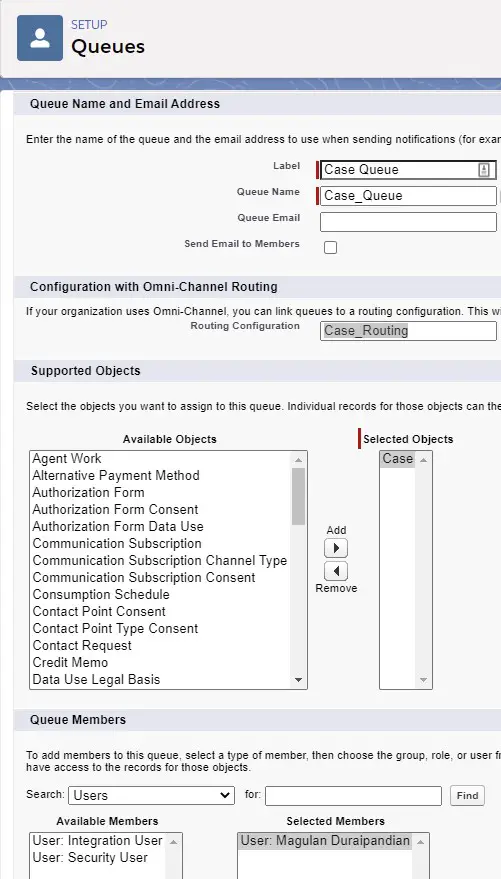
4. Create a new Queue with the Routing Configuration.
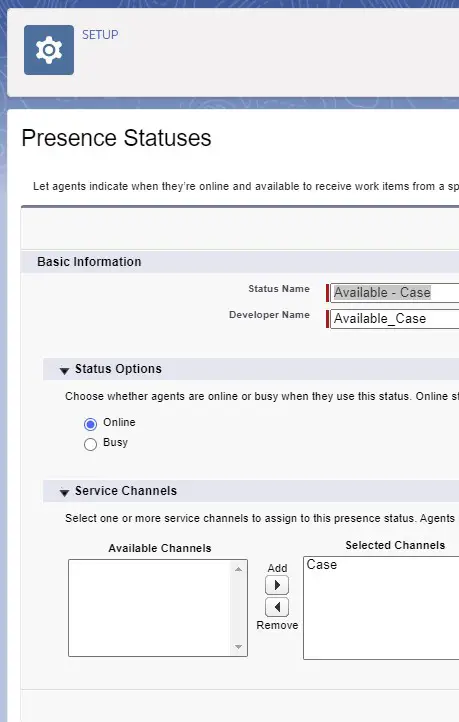
5. Create a Presence Status.
6. Set the Case Service Channel to Status-Based. Select the field(picklist) to calculate the Agent Capacity.
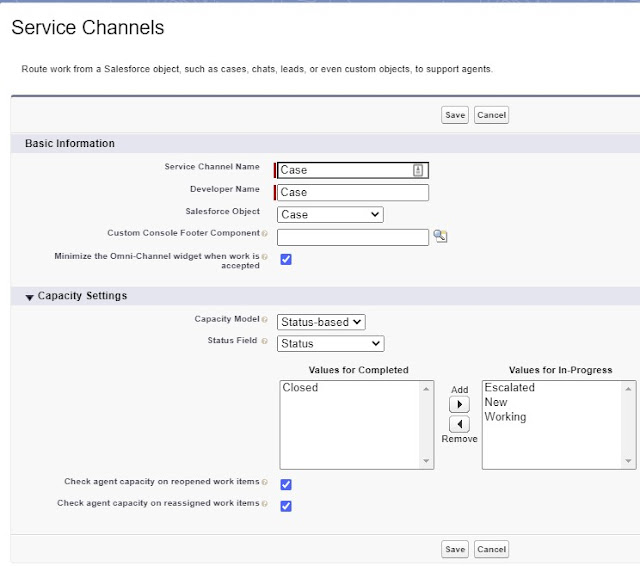
Note:
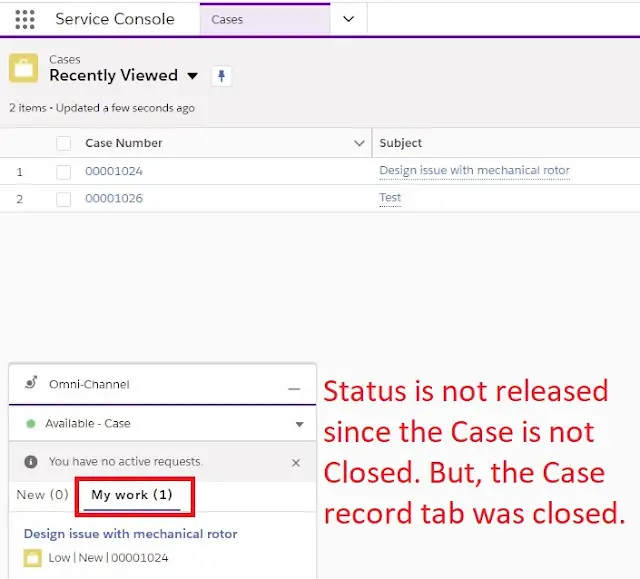
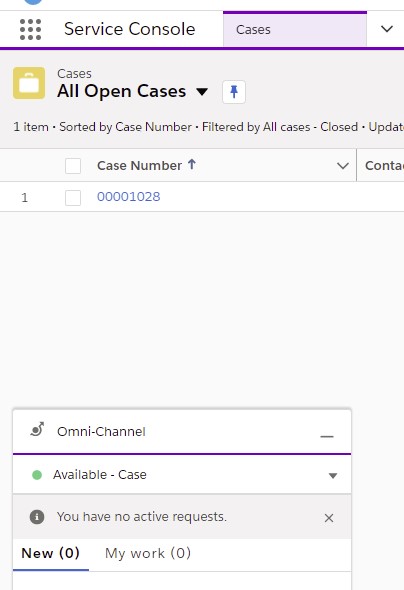
1. When the Case is closed, the Capacity for the agent will be released.
2. When the Case is not closed, the Capacity for the agent will not be released even though the Agent goes offline or logs out or close the Case record tab.
3. If you want to assign the Case to the same Agent if it is re-opened, then disable “Check agent capacity on reopened work items”.
4. If you want to assign the Case to the new owner when Case Owner is updated, then disable “Check agent capacity on reassigned work items”.
To test, follow the below steps.
1. Add Omni-Channel to the Console App.

2. Select Available – Case to accept Cases in Omni-Channel widget.
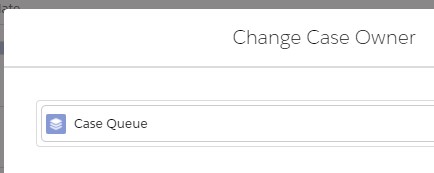
3. Assign a Case to the queue for testing .
4. Case will be routed to the Agent via Omni-Channel Widget.
