
Tired of Clutter? Send Multiple Email Attachments as a Single Zip File in Salesforce Apex!
In this blog post, we are going to see how to send multiple Email Attachments as a single Zip File in Salesforce Apex.
In today’s fast-paced business environment, efficient communication is key. When sending emails from Salesforce, attaching multiple files individually can quickly lead to a cluttered inbox for your recipients and potential attachment limits. What if you could bundle all those important documents into a single, organized zip file?
Good news! With the power of Salesforce Apex and the Compression.ZipWriter class, you can do exactly that. This blog post will guide you through the process of programmatically zipping multiple files and attaching them to an email, significantly enhancing your Salesforce email automation.
Why Send Zipped Attachments from Salesforce?
- Improved User Experience: Recipients receive one clean attachment, making it easier to download and manage multiple files.
- Enhanced Email Deliverability: Reduces the risk of individual attachments being flagged as spam or exceeding email size limits.
- Streamlined Processes: Automate the bundling of related documents for various business processes (e.g., sending invoices, contracts, reports).
- Data Organization: Keeps your email communications tidy and professional.
Introducing Compression.ZipWriter: Your Apex Zipping Powerhouse
Salesforce’s Compression.ZipWriter class is a game-changer for handling file compression within Apex. It provides intuitive methods to add individual “entries” (your files) to a virtual zip archive and then generate the final zipped Blob.
Key Methods of Compression.ZipWriter:
addEntry(String entryName, Blob entryData): Adds a file to the zip archive.entryNameis the name of the file within the zip (including its extension), andentryDatais the binary content of the file.getArchive(): Returns the complete zip file as aBlob.
Step-by-Step: Zipping Files and Sending as Email Attachments in Apex
Let’s dive into the Apex code to see how this comes to life. We’ll walk through an example that fetches ContentVersion records (representing files in Salesforce) and zips them into a single attachment for an email.
Sample Apex Code:
Compression.ZipWriter writer = new Compression.ZipWriter();
List < Id > contentDocumentIds = new List < Id >{
'069Ho00000VHWrPIAX',
'069Ho00000Ztq0tIAB'
};
for ( ContentVersion cv : [
SELECT PathOnClient, Versiondata
FROM ContentVersion
WHERE ContentDocumentId IN :contentDocumentIds
] ) {
writer.addEntry( cv.PathOnClient, cv.versiondata );
}
Blob zipAttachment = writer.getArchive();
Messaging.EmailFileAttachment objEFA = new Messaging.EmailFileAttachment();
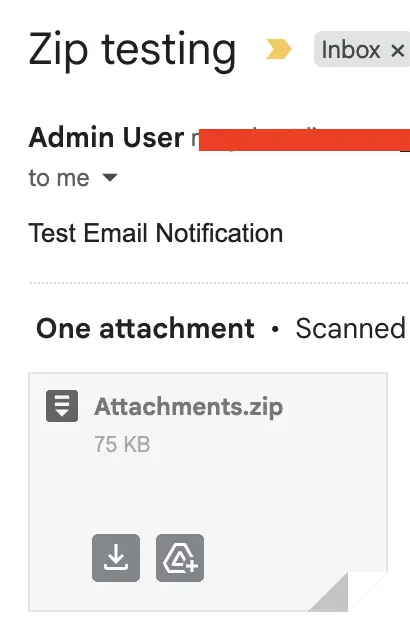
objEFA.setFileName( 'Attachments.zip' );
objEFA.setBody( zipAttachment );
List < Messaging.EmailFileAttachment > fileAttachments = new List < Messaging.EmailFileAttachment > { objEFA };
Messaging.SingleEmailMessage emailMsg = new Messaging.SingleEmailMessage();
emailMsg.setToAddresses(
new String[] { '<Your Email Address' }
);
emailMsg.setSubject( 'Zip testing' );
emailMsg.setFileAttachments( fileAttachments );
emailMsg.setPlainTextBody( 'Test Email Notification' );
Messaging.sendEmail( new Messaging.SingleEmailMessage[] { emailMsg } ); Code Explanation:
Compression.ZipWriterInitialization: We create an instance of theZipWriterclass.- Fetching
ContentVersion: We queryContentVersionrecords using theirContentDocumentId.PathOnClientgives us the original filename, andVersionDataprovides the binary content of the file. - Adding Entries to Zip: We iterate through the
ContentVersionrecords and usewriter.addEntry()to add each file to our virtual zip archive. - Generating the Archive:
writer.getArchive()compiles all the added entries into a singleBlobrepresenting the complete zip file. - Creating
EmailFileAttachment: We create aMessaging.EmailFileAttachmentobject, set itsfileNameto ‘Attachments.zip’ (or any desired name for your zip file), and assign thezipAttachmentBlob as its body. - Sending the Email: The
EmailFileAttachmentis added to a list, which is then set to theSingleEmailMessageobject. Finally,Messaging.sendEmail()dispatches the email.
Important Considerations for Salesforce Zip Attachments
- File Size Limits: While zipping helps, be mindful of Salesforce email attachment size limits (typically around 10MB to 25MB depending on the email service and configuration). Large zip files might still hit these limits.
- Asynchronous Processing: For zipping a very large number of files or extremely large files, consider performing this operation asynchronously using
Queueable ApexorBatch Apexto avoid hitting governor limits. - Error Handling: Always include robust
try-catchblocks to gracefully handle any errors during file retrieval, zipping, or email sending. - Security: Ensure that the users executing this code have appropriate permissions to access the
ContentVersionrecords.
Elevate Your Salesforce Email Automation!
By leveraging the Compression.ZipWriter class, you can significantly enhance your Salesforce email communications, making them more professional, efficient, and user-friendly. Say goodbye to scattered attachments and embrace the power of organized, zipped files!
Start implementing this solution in your Salesforce org today and experience the difference in your email automation!
Reference Article: