How to Fix “The Outbound Call Queue is Misconfigured” in Salesforce & Amazon Connect Service Cloud Voice?
Integrating Salesforce Service Cloud Voice with Amazon Connect provides a powerful contact center experience. However, when end-users or agents attempt to place an outbound call and encounter an error message, it immediately halts operations.
One of the most common errors reported by agents using the Salesforce Service Cloud Voice with Amazon Connect is:
Error:
The outbound call queue is misconfigured. Contact your Salesforce admin for help.
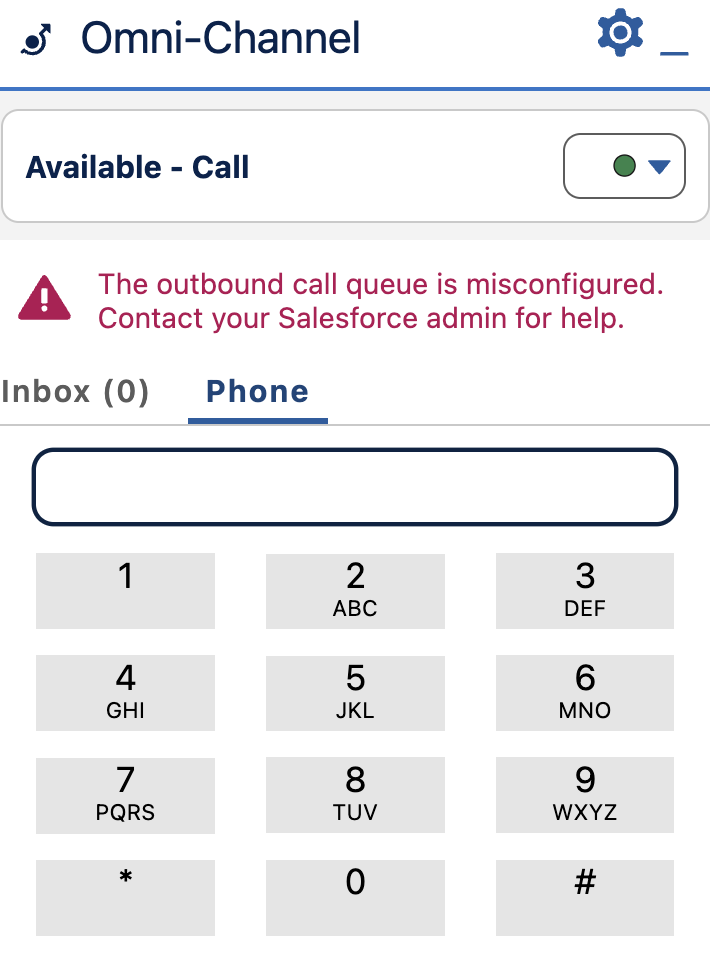
If you are an Administrator, Architect, or Developer managing this integration, this guide walks through why this error happens and the exact resolution steps required on the Amazon Connect side.
Root Cause Analysis
While the error message directs the user to “Contact your Salesforce admin,” the root cause typically resides in the Amazon Connect Routing and Queue settings.
Salesforce hands off the outbound call initiation to Amazon Connect Service Cloud Voice interface. When Amazon Connect processes the request, it checks the agent’s assigned queue for two mandatory outbound call attributes:
- An assigned Outbound Caller ID Number.
- An assigned Outbound Caller Flow (or Outbound Call Flow).
If either of these parameters is missing or improperly mapped within the queue configuration in the Amazon Connect Admin Console, the API call fails and throws the misconfiguration error back to the Salesforce interface.
Step-by-Step Resolution Guide
To resolve this issue, you must update the specific queue configuration directly within Amazon Connect.
Step 1: Identify the Agent’s Queue
- Log into your Amazon Connect Admin Console.
- Navigate to Routing > Queues.
- Identify the queue assigned to the affected user/routing profile.
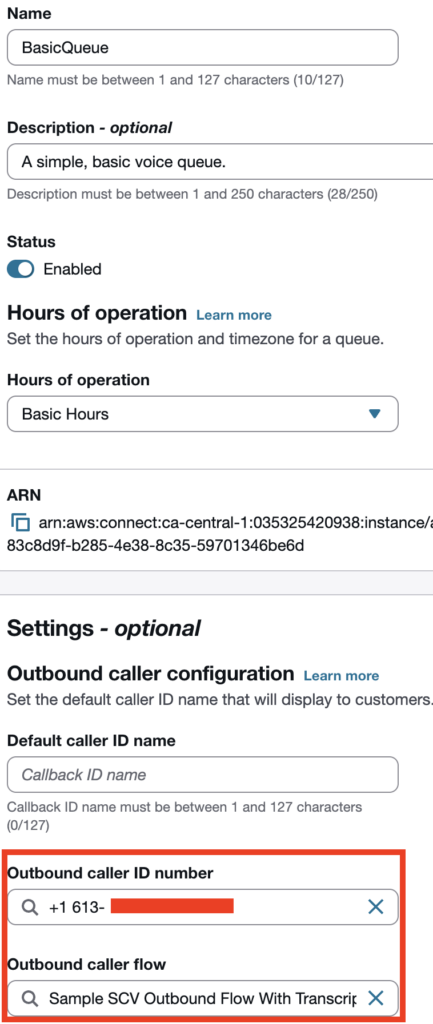
Step 2: Configure Outbound Caller ID & Flow
- Click on the target Queue Name to open its settings.
- Scroll down to the Outbound caller config section.
- Configure the following fields:
- Outbound caller ID number: Select the appropriate claimed phone number from the dropdown list.
- Outbound caller ID name: (Optional) Enter the display name if applicable.
- Outbound caller flow: Select the default or custom outbound whisper flow (e.g.,
Default outbound).
- Click Save at the bottom of the page.
Step 3: Test and Verify
- Attempt an outbound test call to verify the error is resolved.