Step-by-Step Guide: Automating Slack AI Agents with Workflow Forms
Introduction
Are you looking to streamline your team’s support process? Integrating AI into your daily operations is easier than ever with Slack. One of the most powerful features available today is the Channel Expert—an AI agent capable of answering questions based on your channel’s history and files.
But manually tagging the expert every time? That’s a hassle.
In this guide, we will show you exactly how to auto-invoke the Slack Channel Expert by filling out a simple form. By combining Slack’s Workflow Builder with the Channel Expert agent, you can create a seamless, automated loop that captures user queries and instantly provides AI-generated solutions.
Why Automate Your Channel Expert?
Before we dive into the steps, it is important to understand why this workflow is a game-changer for productivity:
- Standardized Input: using a form ensures you get all the necessary details from the user upfront.
- Instant AI Response: The Channel Expert replies immediately when mentioned, reducing wait times for human support.
- Knowledge Base Utilization: The agent pulls from specific files or channel history, ensuring accurate, context-aware answers.
Step-by-Step Configuration Guide
Follow these instructions to set up your automation.
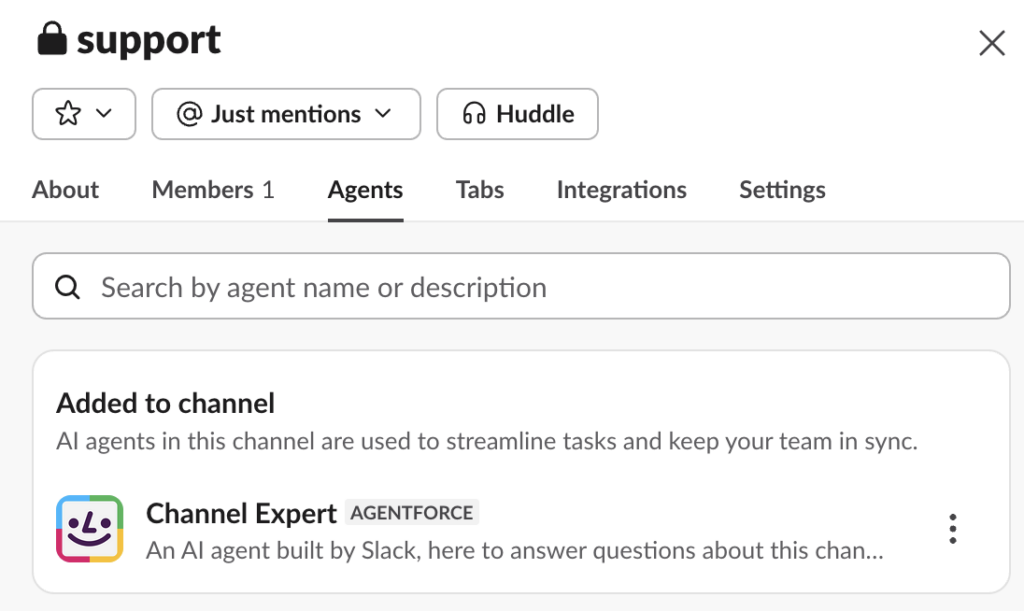
Part 1: Configure the Channel Expert Agent
First, we need to ensure the Channel Expert is active in your desired channel and knows where to look for information.
- Open the Slack Channel where you want to create the Form.
- From “More actions” (the three dots usually found in the top right), select Edit Settings.
- Select the “Agents” tab.
- Click the + icon to add the “Channel Expert” to the Slack Channel.
Important Note: Click Edit Agent Settings to choose the sources for the Channel Expert to assist users. You can choose between:
- All channel content: (messages and files)
- Only specific content you add: (uploaded files, canvases, or lists)
Close the popup after configuring.
Part 2: Create the Workflow
Now, we will build the workflow that captures data and triggers the agent.
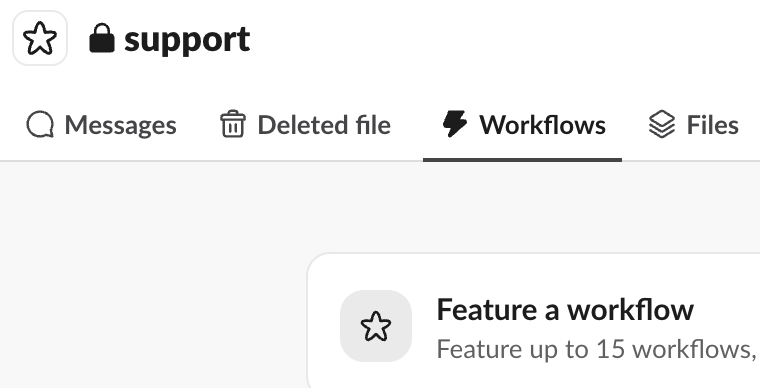
- Select the Workflows tab in the Slack Channel settings.
- Click the “Add workflow” button to create a new Workflow.
- Click “Create From Scratch”.
- In the “Start the workflow…” Section, click Choose an event.
- Select “From a link in Slack”.
- Click Continue.
Part 3: Design the Automation Logic
Here is where the magic happens—connecting the form to the AI agent.
- In the “Then, do these things” Section, click “Add steps” to design your form. Use the “Collect info in a form” option and add your specific questions.
- Click “+ Add Step”. Use the “Send a message to” option. In the message body, @mention the Channel Expert to invoke the Channel Expert AI Agent.
- Click “+ Add Step” to add additional steps as per your use case and business process (e.g., sending a notification to a manager or logging the ticket in Jira).
- Click “Finish Up” to publish the workflow.
Part 4: Testing
- Execute the Workflow (click the shortcut link) to check whether the Channel Expert is invoked and replies correctly.