Tailoring Your Customer’s Chat Experience: A Guide to Salesforce Messaging for Web Chat Window Configuration
In today’s digital-first world, providing seamless and accessible customer support is paramount. Salesforce Messaging for Web offers a powerful platform to engage with your website visitors in real-time. A key aspect of delivering a great user experience is ensuring the chat window itself is perfectly sized and branded for your website. This guide will walk you through the simple yet crucial steps to configure your Salesforce chat window dimensions, enhancing both usability and brand consistency.
Why Chat Window Dimensions Matter
Before diving into the “how-to,” let’s consider the “why.” The size of your chat window can significantly impact the user experience. A window that is too small can feel cramped and difficult to use, especially for lengthy conversations. Conversely, a window that is too large can obstruct important content on your website, frustrating visitors. Finding the optimal size is a balance between providing a comfortable chat interface and maintaining the integrity of your website’s design.
A Step-by-Step Guide to Configuration
Customizing the dimensions of your Salesforce Messaging for Web chat window is a straightforward process. Here’s how you can do it directly within the Salesforce Setup menu:
1. Navigate to Salesforce Setup
Your journey begins in the heart of Salesforce administration. Click the gear icon in the top-right corner and select Setup.
2. Locate Embedded Service Deployments
In the ‘Quick Find’ box on the left-hand side of the Setup menu, type “Embedded Service Deployments” and select it from the results. This will take you to a list of your existing chat deployments.
3. Choose Your Deployment
From the list of Embedded Service Deployments, select the specific one you wish to configure. This is the deployment that is active on your website.
4. Access Branding Settings
Once you’ve opened your desired deployment, look for the Branding section and click on it. This area allows you to customize the look and feel of your chat window to align with your company’s branding.
5. Adjust the Chat Window Dimensions
Within the Branding settings, you’ll find the “Chat Window Dimensions” section. Here, you can specify the Height and Width of your chat window in pixels.
For example, you might set the width to 350 pixels and the height to 500 pixels for a comfortable, mobile-friendly chat experience. Feel free to experiment with these values to find what works best for your website’s layout.
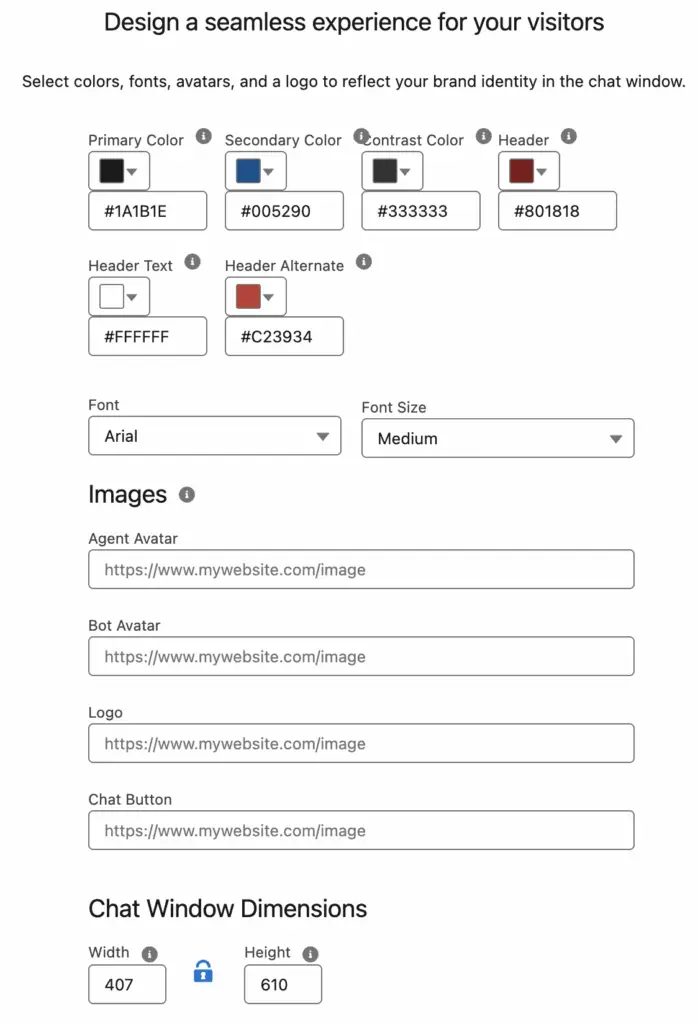
After you have entered your desired dimensions, be sure to save your changes and Publish the Embedded Service Deployment. The updated chat window size will then be reflected on your website.
Beyond the Basics: Additional Branding Options
While you’re in the Branding section, take the opportunity to explore other customization options to create a truly integrated experience. You can adjust:
- Colors: Match the chat window’s colors to your website’s palette.
- Fonts: Select fonts that align with your brand’s typography.
- Labels: Customize the text that appears on the chat button and in the pre-chat form.
By taking a holistic approach to your chat window’s design, you can provide a customer interaction that is not only helpful but also reinforces your brand identity. A well-configured chat window is a small but significant detail that contributes to a professional and user-friendly online presence.