Introduction
For Salesforce professionals—whether you are a Developer, Architect, or technical Admin—managing code quality is non-negotiable. Code coverage is a crucial metric in Salesforce development, with a minimum of 75% coverage required for Apex code deployment to production environments.
While you can check these metrics in the Developer Console, modern workflows favor the power of the IDE. You can check and visualize this coverage directly within Visual Studio Code (VS Code) using the official Salesforce Extensions. This guide will walk you through the configuration and execution steps to view your coverage in real-time.
Viewing Code Coverage in VS Code
To enable and view code coverage highlighting in VS Code, you need to adjust a specific setting and then execute your tests. Here is how to configure your environment.
1. Enable the Setting
Before running your tests, ensure your IDE is configured to retrieve coverage data.
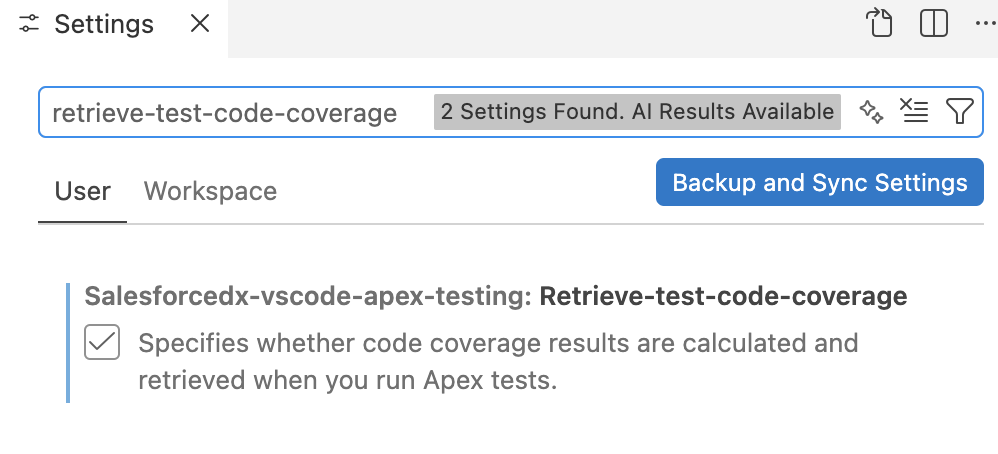
- Open your VS Code settings (File > Preferences > Settings or Code > Settings).
- Search for
retrieve-test-code-coverage. - Check the box for Salesforcedx-vscode-core: Retrieve Test Code Coverage.
2. Run Tests
Once the setting is enabled, you have multiple ways to execute your Apex tests depending on your workflow:
- Context Menu: Right-click a specific Apex class or test method and select
SFDX: Run Apex Test(s). - Command Palette: Open the Command Palette (Ctrl+Shift+P or Cmd+Shift+P) and run a command like
SFDX: Run Apex Test Suite. - Salesforce CLI: You can also use the CLI command below for programmatic results:
sf logic run test --code-coverage
3. Visualize Results
After the tests run, the results will appear in the Output panel, showing coverage percentages. However, the most powerful feature is the visual line highlighting.
To see line-by-line highlighting in your code editor:
- Look for the “three bars” (hamburger) icon in the status bar at the bottom of the window, next to the org alias.
- Click the icon to toggle highlighting.
- Green highlighting indicates lines covered by tests.
- Red highlighting indicates lines not covered.
Understanding the Metrics: Code Coverage vs. Test Coverage
While often used interchangeably in the context of Salesforce’s requirements, these terms have distinct definitions in general software testing. It is important for Architects and Senior Developers to understand the nuance.
| Feature | Code Coverage | Test Coverage |
| Type | White-box testing | Black-box testing |
| Definition | Measures the percentage of your source code (specifically Apex code) that is executed when your tests run. | Measures how many of your application’s use cases and functional requirements are covered by your test cases. |
| Primary Audience | Developers (identifying untested code paths). | QA Testers (focusing on application behavior and design specs). |
Note: Salesforce uses “code coverage” to refer to the metric required for deployment, which serves as one indication of test effectiveness.
Recommendations & Best Practices
Based on the testing standards discussed above, here are the key takeaways for maintaining a healthy Salesforce org:
- Go Beyond the Minimum: While Salesforce mandates a 75% limit for deployment, strictly aiming for this number is a risk. You should aim to cover all major use cases to ensure robust, high-quality code, not just meet the 75% minimum.
- Comprehensive Scenarios: Ensure your test classes cover positive (expected behavior), negative (error handling), and bulk (large data volume) scenarios.
- Use Visual Feedback: Regularly use the Red/Green highlighting in VS Code during development. Seeing red lines on logic branches (like
if/elsestatements) helps you immediately identify which logic paths your test class is missing.