💻 Blog Post: Search Smarter: How to Find Salesforce Records Directly in Slack (High-Speed Guide)
Are you constantly switching between Slack and Salesforce to find the right customer data? Stop! You can dramatically improve your team’s efficiency and data accessibility by searching for Salesforce records directly within Slack. This integration is a game-changer for sales, service, and operations teams who live in their chat environment.
This step-by-step guide shows you exactly how to set up and use the powerful Slack-Salesforce search integration.
Section 1: Establishing the Connection (Setup)
Before you can search, you need to ensure your Salesforce Org and your Slack workspace are properly linked. This is a one-time setup that unlocks all the integrated features.
Step 1: Initiate the Connection from Slack
Start the linking process by connecting your Salesforce Org within the Slack app.
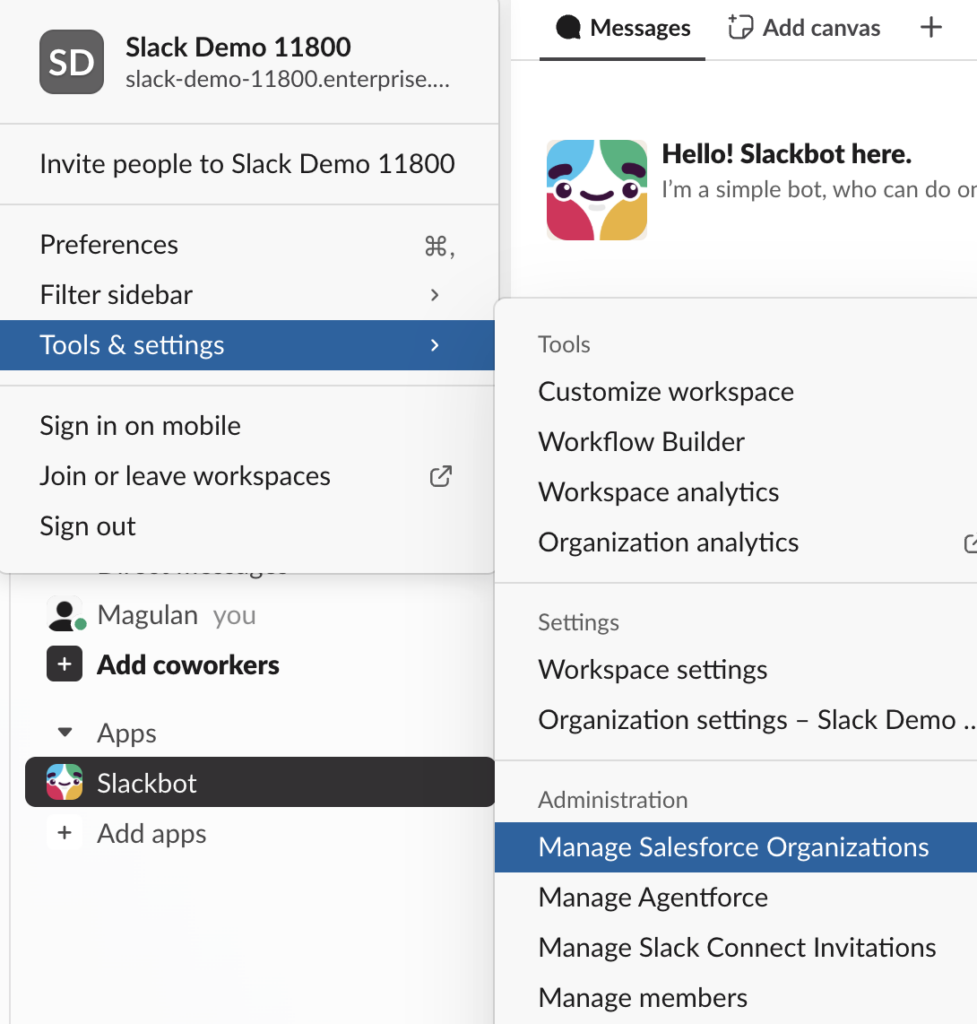
- In Slack, find the Salesforce App.
- Select the “Manage Salesforce Organizations” option.
- Follow the prompts to begin the authentication process and choose the specific Salesforce environment you want to connect (e.g., Production or Sandbox).
Step 2: Accept the Connection in Salesforce
The connection initiated in Slack must be authorized on the Salesforce side for security and access.
- Log in to your Salesforce Org.
- Navigate to Setup.
- In the Quick Find box, search for and go to “Manage Slack Connection”.
- Accept the pending connection request to finalize the link between the two platforms.
Step 3: Refresh Your Slack App
To ensure the new connection is fully recognized and all features are activated, you need to perform a hard refresh of your Slack application.
- On Windows: Use the keyboard shortcut
Ctrl + Shift + R.
- On Mac: Use the keyboard shortcut
Cmd + Shift + R.
Your Slack app will reload, and the Salesforce search capabilities will now be available!
Section 2: Searching for Salesforce Records in Slack
Once the setup is complete, finding records is fast and intuitive.
Step 4: Access the Salesforce Search Feature
When you use the general Slack search bar, you’ll see a new option specifically for Salesforce.
- Open the Slack Search bar (usually
or
).
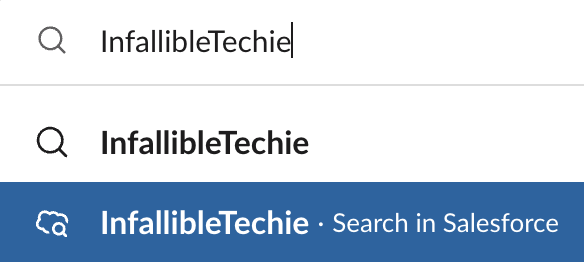
- Enter your search term (e.g., a Contact name, an Account name, or a Case number).
- From the search results or filtering options that appear, make sure to select “Search in Salesforce” to direct your query to your linked Org.
Step 5: Filter Your Search for Precision
To narrow down your results and find exactly what you need quickly, use the integrated filtering options.
- After the initial search is performed, you can select specific objects to search (e.g., only search Accounts, only search Cases, etc.). This prevents irrelevant results from other record types.
- Additionally, you can select the “Created by me” option to refine the results to only show records you own or have created. This is perfect for quickly checking your personal workload or recently updated records.