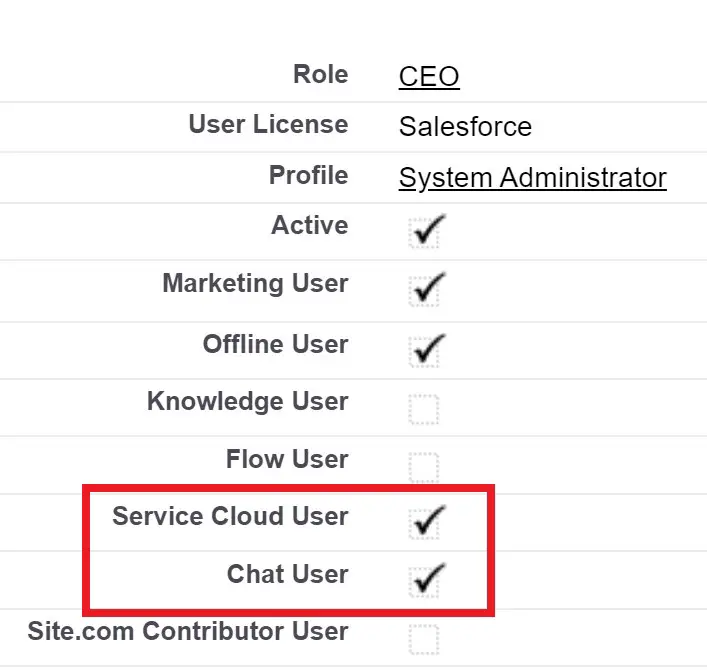
1. Enable “Service Cloud User” and “Chat User” on your User Detail.
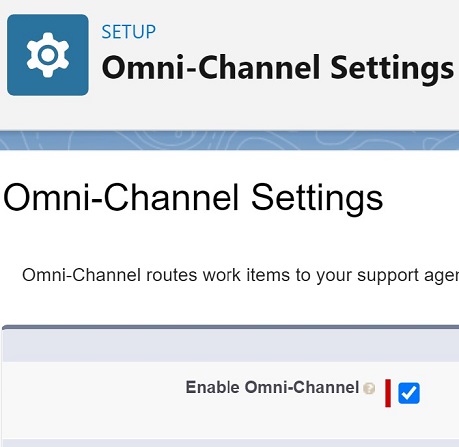
2. Go to Omni-Channel Settings in Setup and enable “Enable Omni-Channel”.
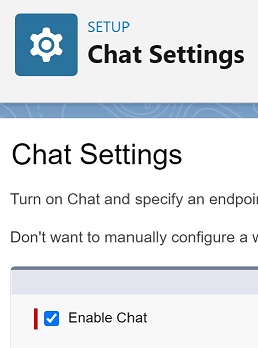
3. Go to Chat Settings in set up and enable “Enable Chat”.
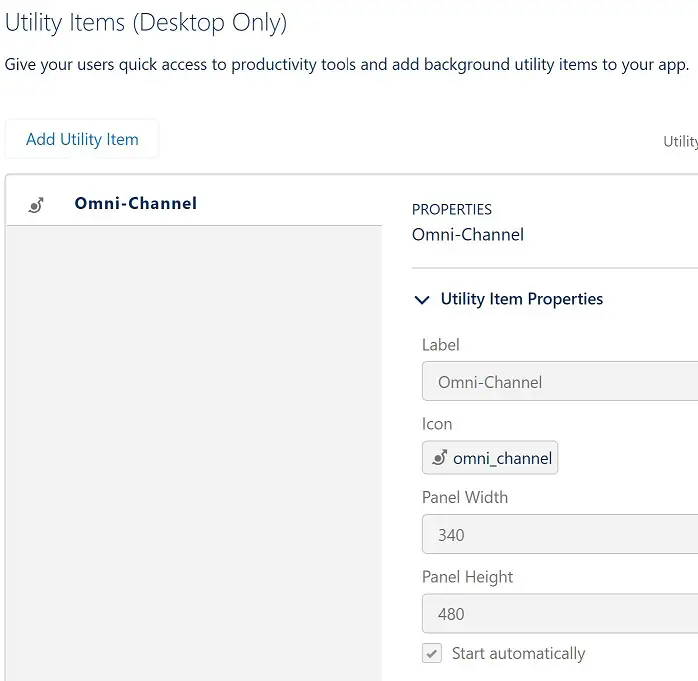
4. In the Console App, add Omni-Channel Widget.
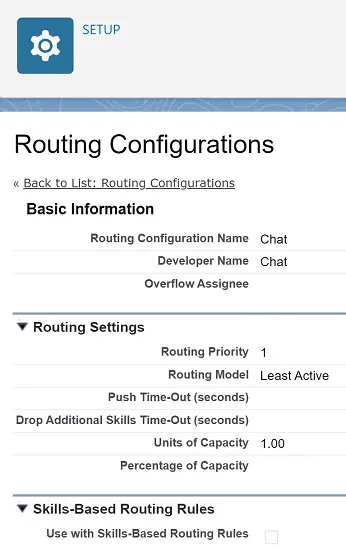
5. Create a Routing Configuration.
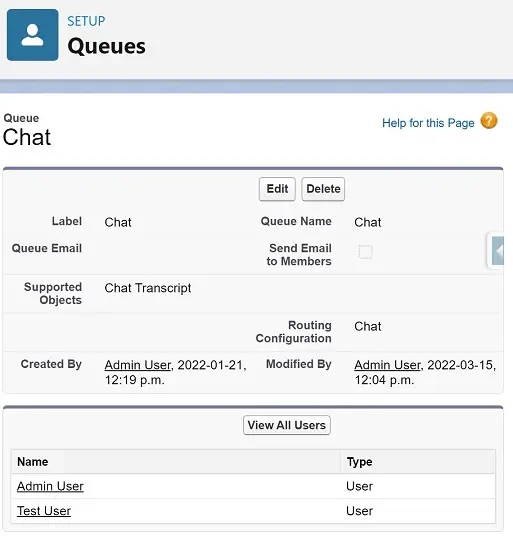
6. Create a Queue with the Routing Configuration created in Step 5.
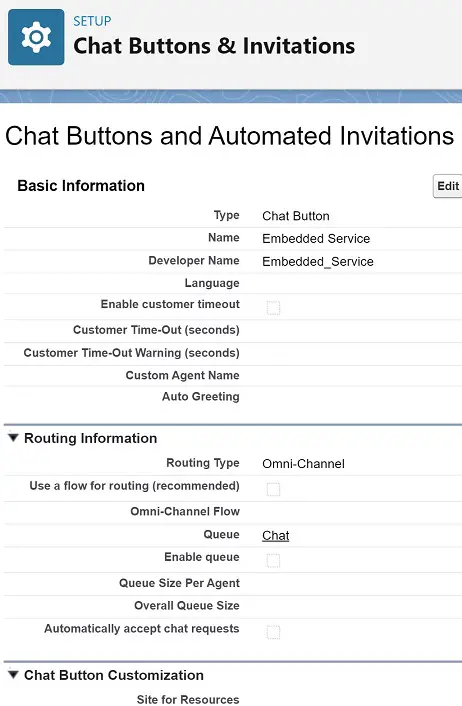
7. Create a Chat Button using the Queue created in Step 6.
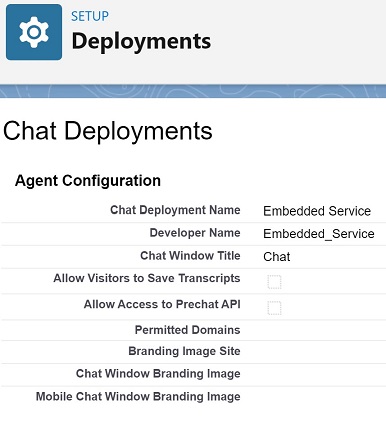
8. Create a Chat Deployment.
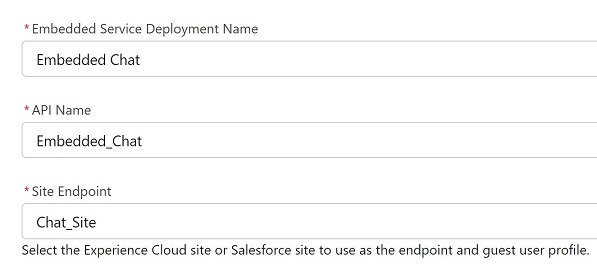
9. Create an Embedded Service Deployment. Site Endpoint can be Experience Cloud Site or a Force.com Site. It need not be the Experience Cloud Site where Chat will be hosted.
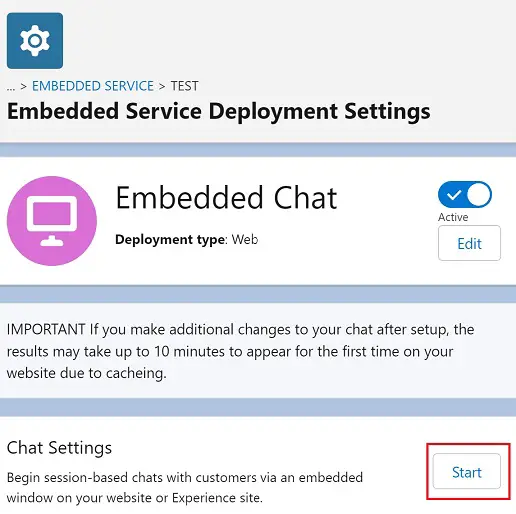
10. Click Start in Chat Settings.
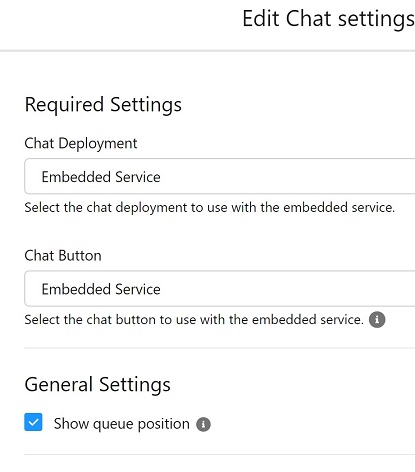
11. Select the Chat Button and Deployment created in Step 7 and 8.
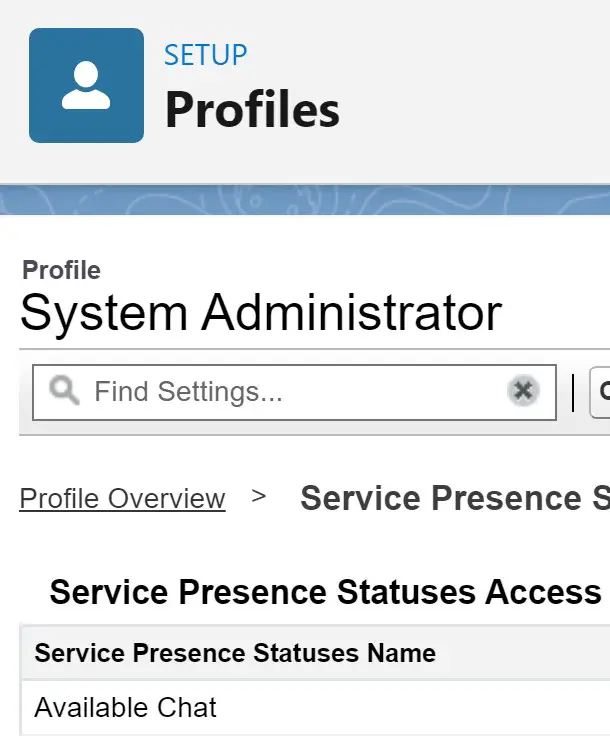
12. Create a Presence Status for Chat Channel.

13. Assign the Presence Status created in Step 12 to your Profile.
14. Add Embedded Service Chat Component to the Template Footer in the Experience Cloud Site Builder.

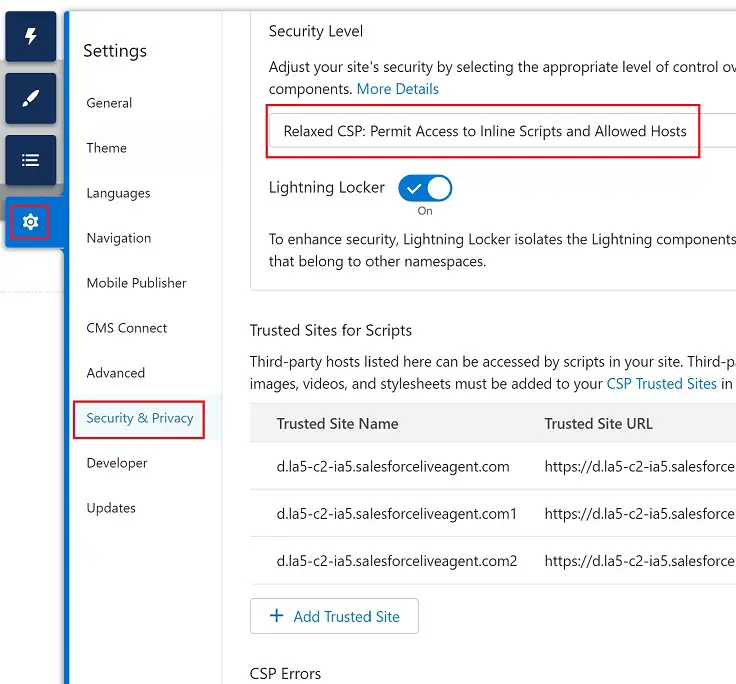
15. In the Experience Cloud Builder, go to Security & Privacy. Set Security level ot “Relaxed CSP: Permit Access to Inline Scripts and Allowed Hosts”. Click allow for all the Live Agent Endpoints under Trusted Sites for Scripts.
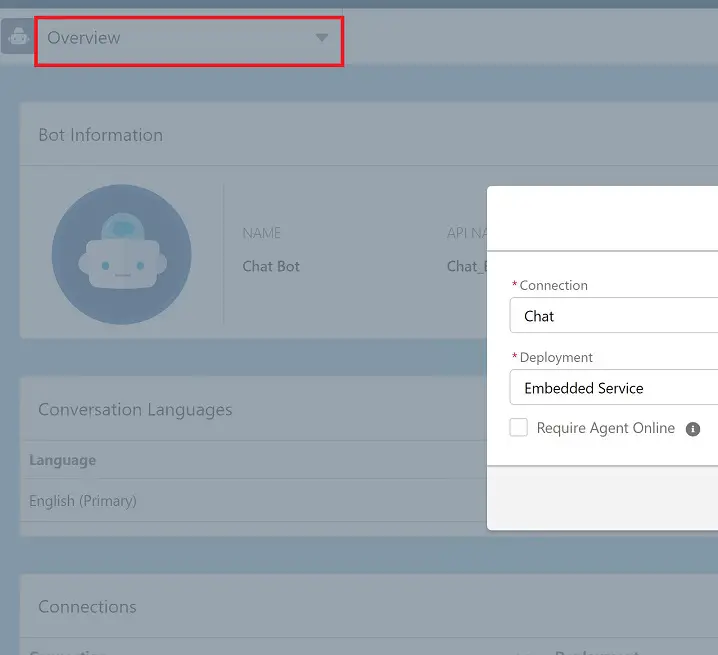
16. Create an Einstein BOT. Select Overview. Click Add in Connection section. Select Chat as the Connection and the Embedded Service Deployment in the Deployment.
17. Activate the BOT.
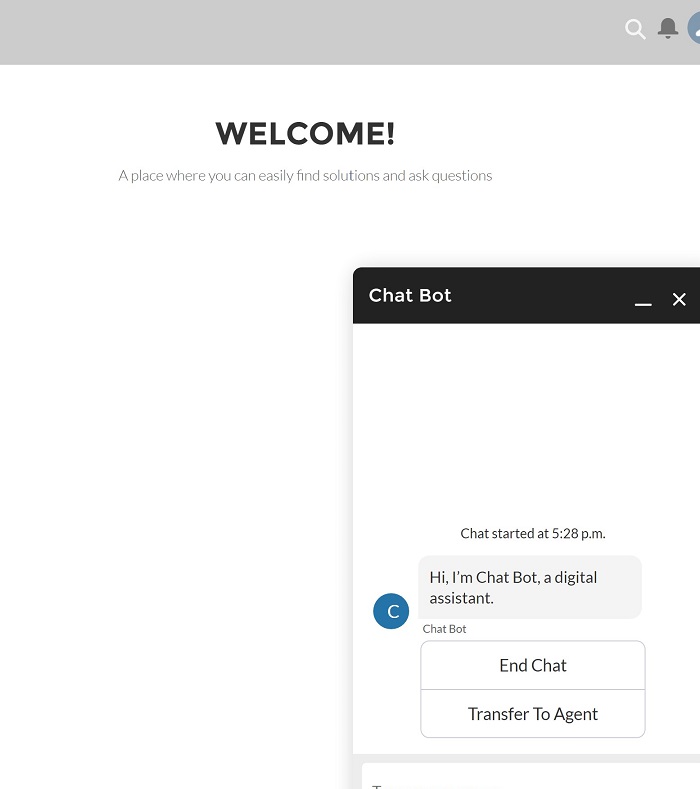
18. To test, initiate the Chat from the Experience Cloud Site. It will engage the BOT.