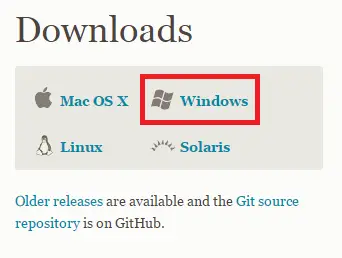
1. Go to https://git-scm.com/downloads.
2. Select the Operating System to download the GIT.
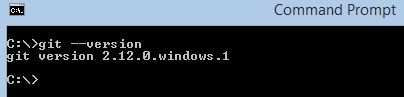
3. Check whether it was installed properly.
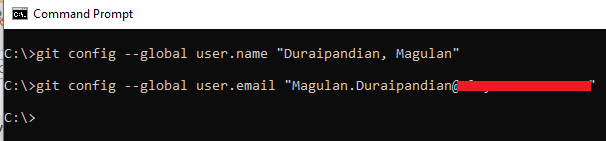
4. Configure GIT in your PC.
5. Create a repository in Bitbucket.
6. Create a folder in your computer.
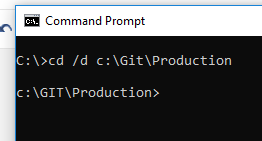
7. Navigate to that folder using command prompt. This folder will be your local repository for master branch(Production).
8. Clone the repository into your local repository.
git clone https://REPOSITORYURL.git
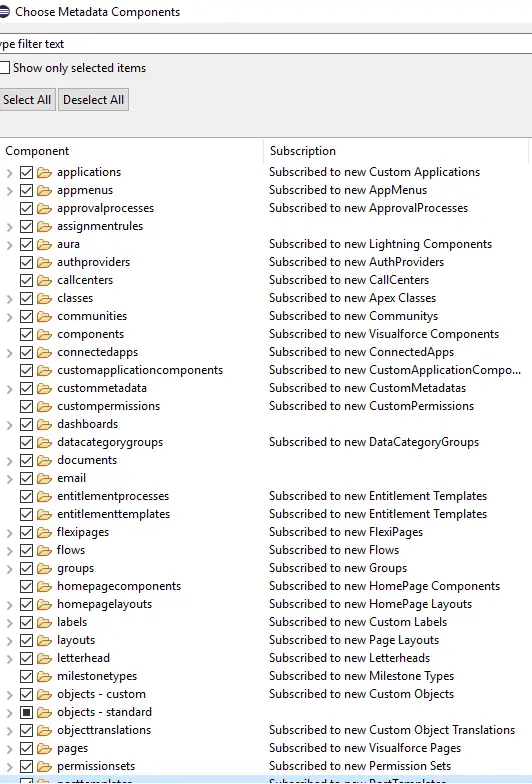
9. Use Force.com IDE or ANT or any other tool and get all the metadata. I have used Eclipse with Force.com IDE.
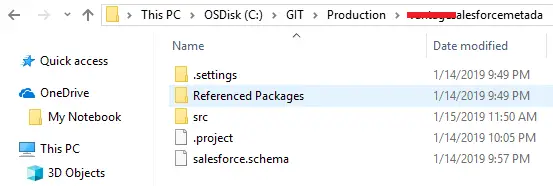
10. Move the extract to the local repository folder.
11. Run the below commands one by one.
cd existing-project
git init
git add --all
git commit -m "Initial Commit"
git remote add origin https://REPOSITORYURL.git
git push -u origin master
12. Go to Bitbucket and create a branch from existing master branch.
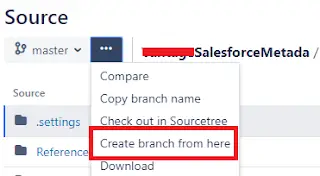
I have created a branch called FullSandbox.
13. In your computer create a folder for this branch. I have created with the name FullSandbox.
14. Download and install TortoiseGit.
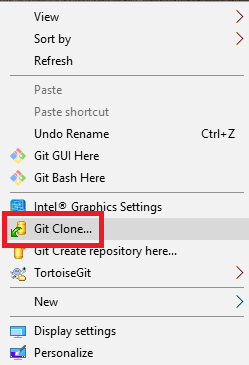
15. Navigate to that folder created in step 13.
16. Right Click and select Git Clone.
12. Enter the URL and enter the branch name.
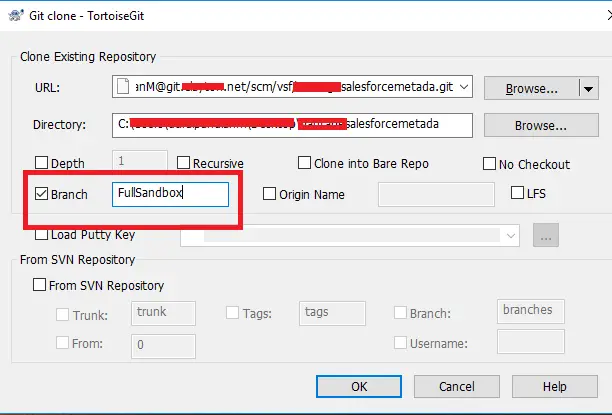
This will be your local repository for FullSandbox branch.
13. Use Force.com IDE or ANT or any other tool and get all the metadata from Full sandbox. I have used Eclipse with Force.com IDE.
14. Move it to the directory.(Replace the files which are already existing since it is from master branch(production)).
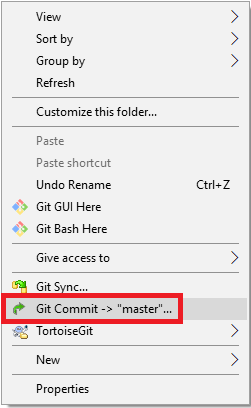
15. Right click

16. Click Commit button. This will commit to local repository.
17. Click Push button. This will push it to the remote repository.
18. Do the same steps 13 to 17 for all the branches. Below is for Production. Make sure you have the latest refreshed metadata using Force.com IDE or ANT or any other tool.