Using Outbound Messaging a message is sent to the specified endpoint URL. The message contains
the fields specified when you created the outbound message. Once the
endpoint URL receives the message, it can take the information from
the message and process it. To do that, you need to examine the outbound
messaging WSDL. Salesforce must be configured to send outbound messages before the publisher will receive any data.
When setting up the outbound message, be sure to define these settings.
- Endpoint URL
- Fields to send
- Include session ID
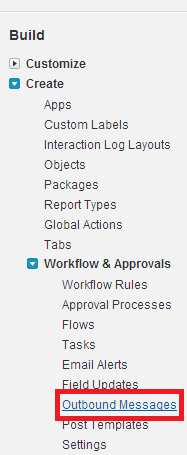
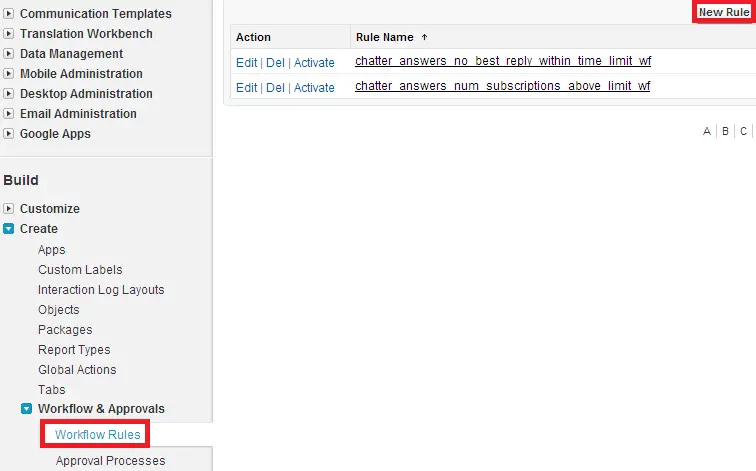
1. Go to Build –> Create –> Workflow & Approvals –> Outbound Messages.
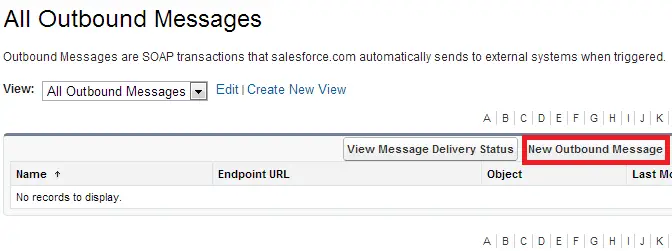
2. Click “New Outbound Message” button.
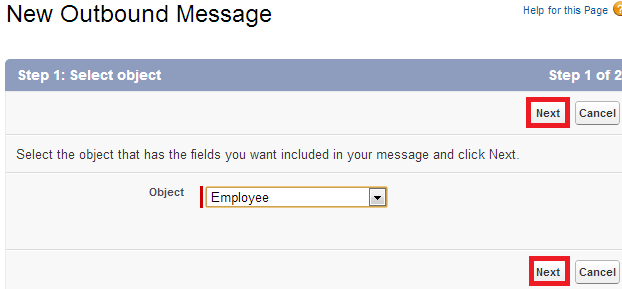
3. Select the object and click “Next” button.
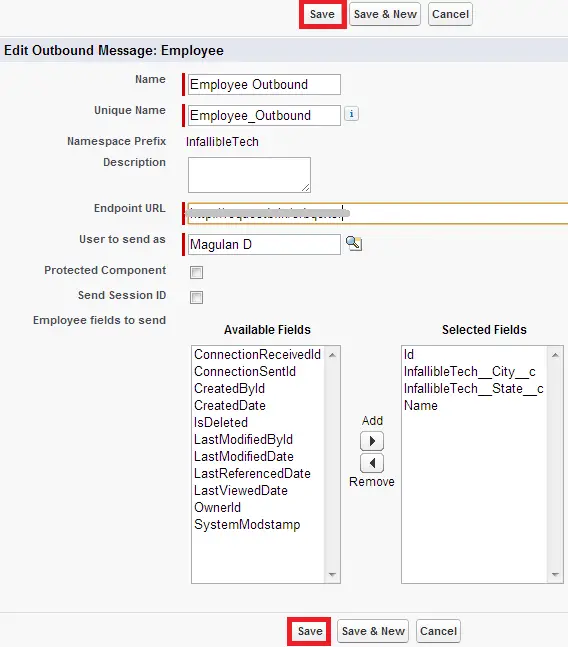
4. Enter the details and click “Save” button.
5. Go to Build –> Create –> Workflow & Approvals –> Workflow Rules and click “New Rule”.
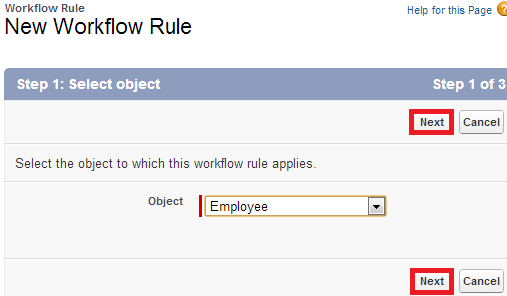
6. Select the object and click “Next” button.
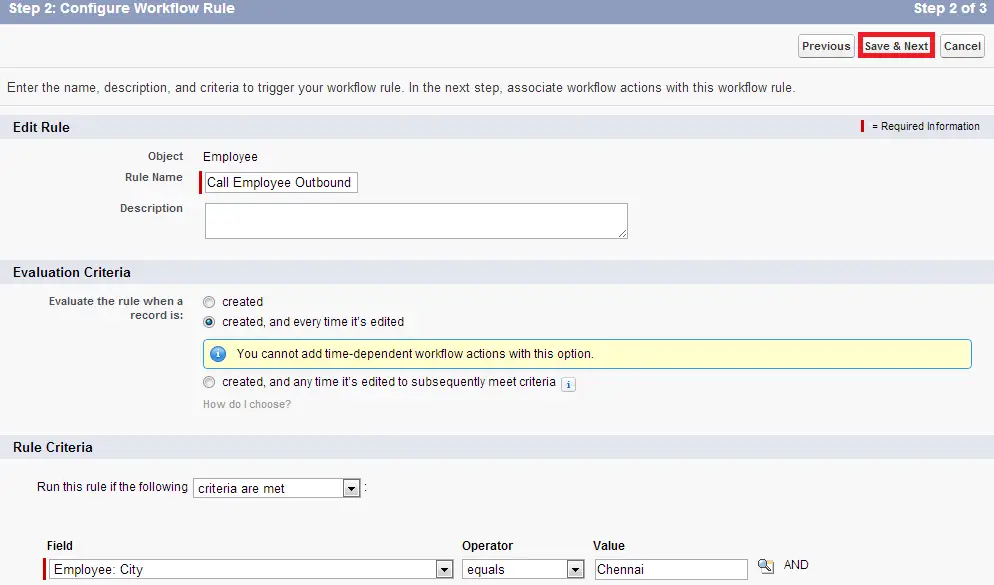
7. Enter the details and click “Save&Next” button.
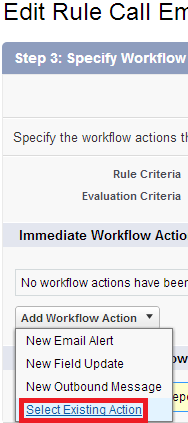
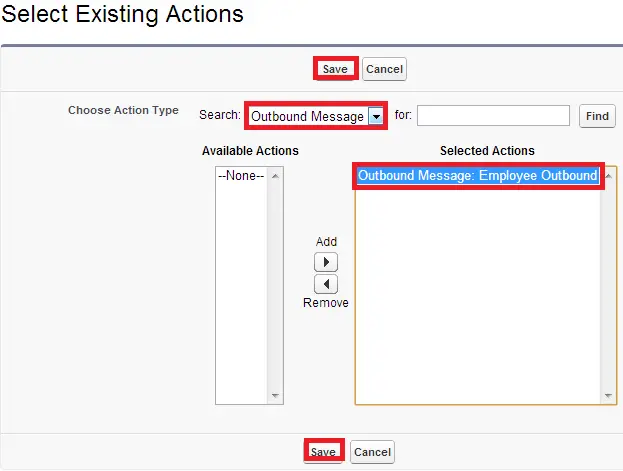
8. Click “Select Existing Action”.
9. Select the outbound message and click “Save” button.
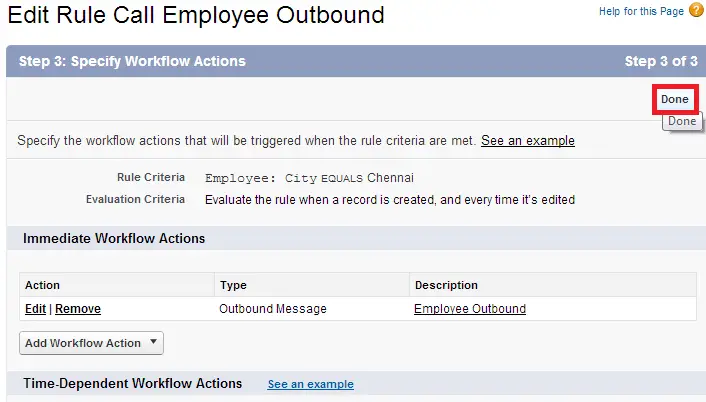
10. Click “Done” button.
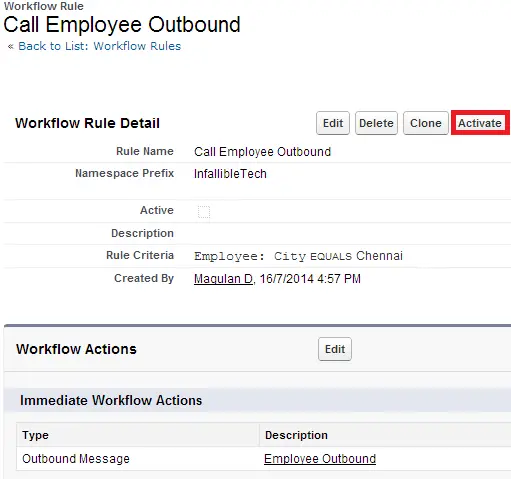
11. Click “Activate” button.