Please check the Blog Post for Salesforce Messaging for In-App and Web Authentication setup.
Prerequisites:
- OpenSSL
- JDK
- Maven
1. Use the following command to generate the Certificate and a Private Key.
openssl req -x509 -newkey rsa:2048 -nodes -keyout PrivateKeyFile.key -out PublicCertFile.crt -sha256 -days 3652. Use the following command to generate a Public Key.
openssl rsa -in PrivateKeyFile.key -pubout -out PublicKeyFile.key3. Download the project using Download ZIP option from the following link.
https://github.com/Salesforce-Async-Messaging/key-command-line-utility
4. Extract the Zip. Run the following command in the extracted key-command-line-utility-master project directory.
mvn clean installThis command creates a key-command-line-utility.jar file. The jar file resides in the target folder. Please make a copy of this jar file to the Certificate, Private Key and Public Key folder.
5. Use the following commands to create JWT and JWK.
JWT:
java -jar {path/to/}key-command-line-utility.jar --generateJwt -kid 12345 -issuer testIssuer -subject user1 -expiry 6000 -alg RS256 -privateKeyFile {path/to/}PrivateKeyFile.keyExample:
java -jar key-command-line-utility-master/target/key-command-line-utility.jar --generateJwt -kid 12345 -issuer testIssuer -subject user1 -expiry 6000 -alg RS256 -privateKeyFile PrivateKeyFile.keyJWK:
java -jar {path/to/}key-command-line-utility.jar --generateJwk -kid 12345 -alg RS256 -publicKeyFile {path/to/}PublicKeyFile.key -publicCertFile {path/to/}PublicCertFile.crtExample:
java -jar key-command-line-utility-master/target/key-command-line-utility.jar --generateJwk -kid 12345 -alg RS256 -publicKeyFile PublicKeyFile.key -publicCertFile PublicCertFile.crt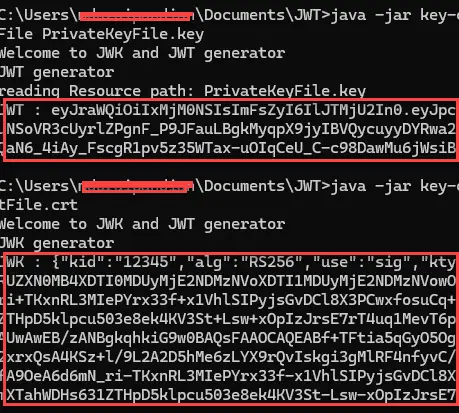
6. Create a file with the extension “.json” using the JWK value generated using the command in step 5.
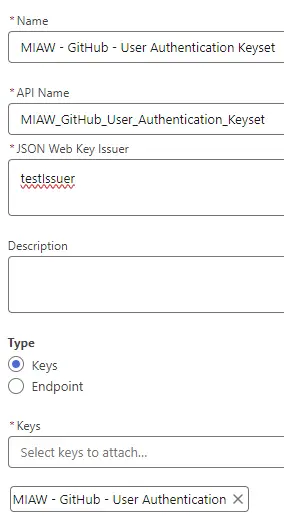
7. Go to “Messaging for In-App and Web User Verification” in Salesforce Setup. Click New Key in “JSON Web Keys” section. Upload the JSON file from Step 6.
8. Click New Keyset button in “JSON Web Keysets” section. Make sure “JSON Web Key Issuer” is the Issuer used in Step 5 commands. Select the Key created in Step 7 and save it.
9. In the Messaging Channel, enable “Add User Verification”.

10. In the Messaging Channel, in the “User Verification Configuration” section, use the New button to create a User Verification Configuration.
11. Use the following code before the embeddedservice_bootstrap.init().
window.addEventListener("onEmbeddedMessagingReady", () => {
console.log(
"onEmbeddedMessagingReady event"
);
embeddedservice_bootstrap.userVerificationAPI.setIdentityToken({
identityTokenType: "JWT",
identityToken: "<Paste the JWT from Step 5 command>",
});
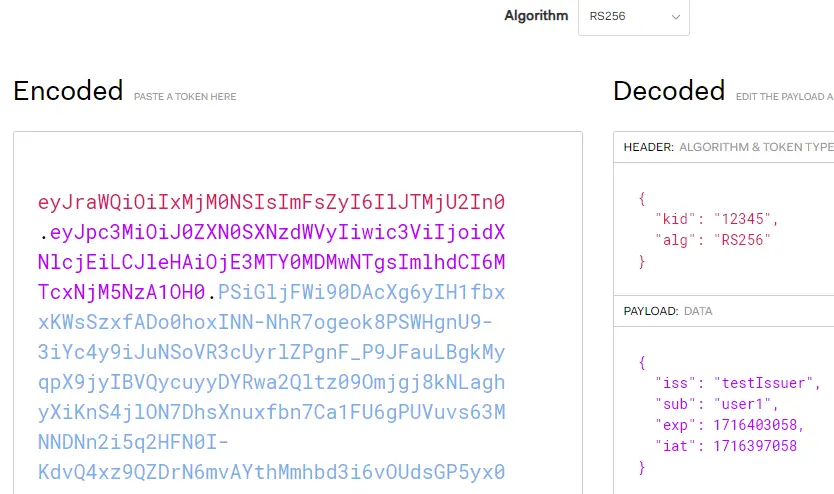
});12. Copy paste the JWT generated using the command in step 5 in https://jwt.io/ and validate.
kid in JWT token should match with kid of JWK
iss of JWT should match with issuer of JSON Web Keysets
sub of JWT is the identifier of the messaging end-user in SF
13. Initiate the Messaging to test it.
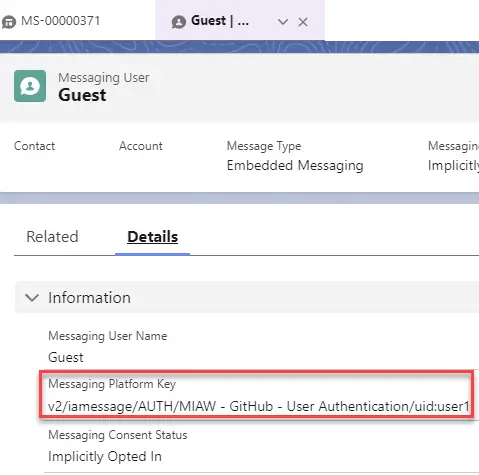
14. Verify the Messaging User. Messaging Platform Key should be in the following format:
v2/iamessage/AUTH/{auth_id_info}/uid:{sub}