For Omni-Channel Case Routing using Queues in Salesforce, use the below steps.
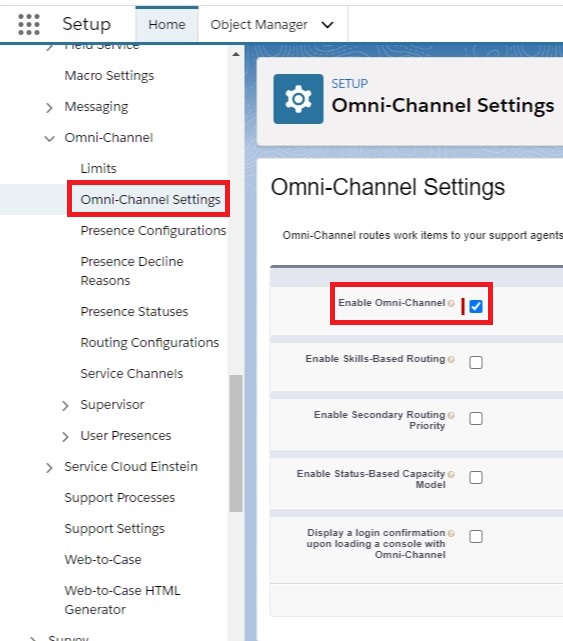
1. Enable Omni-Channel.
2. Go to Service Channels in Setup. Create Service Channel for standard Case Object.

3. Go to Routing Configuration in Setup. Create a Routing Configuration.

4. Go to Presence Configuration in Setup. Create Presence Configuration.

5. Go to Queue in Setup. Create Queue for Case Object.

6. Go to Presence Status in Setup. Create Presence Status

7. Go to App Manager in Setup. Open the Service Console app. Add Omni-Channel in Utility Items(Desktop Only).

8. Add the Service Presence Status to the Profile.

9. Set your status in Omni-Channel widget to receive Cases.

10. To test, change any Case Owner to High Priority Cases Queue, it will route it through Omni-Channel Configuration.

