Using a simple web form, we can allow our customers to submit cases directly to our customer support group on-line. These cases will be automatically created in Salesforce.com.
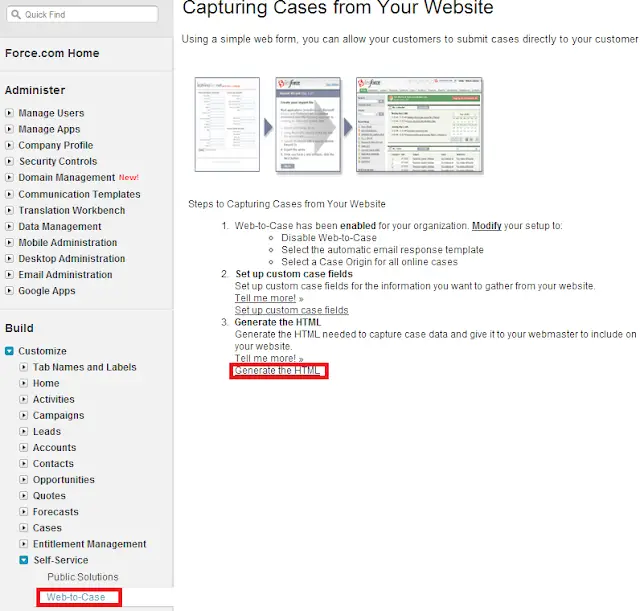
1. Go to Setup –> Build –> Customize –> Self-Service –> Web-to-Case.
2. Click the “Generate the HTML” link.
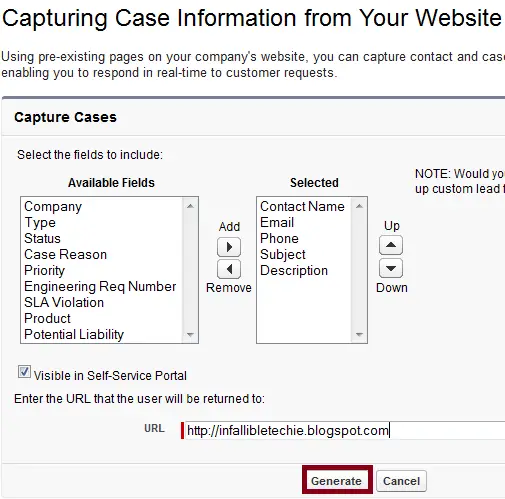
3. Select the required fields and enter the return URL and click “Generate” button.
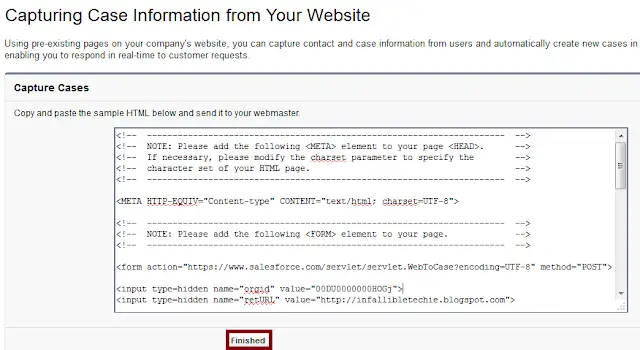
4. Copy and paste the HTML generated in your blog or website.
5. Click “Finished” Button.
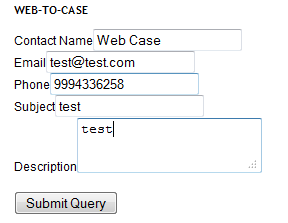
6. Go to the form created using generated HTML in your blog or website.
7. Click “Submit Query” button.
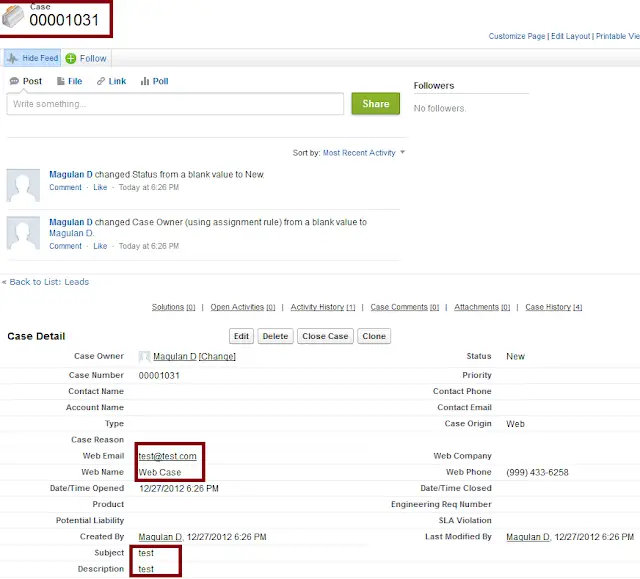
8. Check the created Case in your Salesforce organization.