1. Create an Account in Heroku – https://api.heroku.com/signup.
2. Install GIT.
3. Install Heroku Toolbelt – https://toolbelt.heroku.com.
4. Clone the below project.
https://github.com/forcedotcom/SalesforceCanvasFrameworkSDK
5. Create a folder with the name “SalesforceCanvasFrameworkSDK” in C drive.
6. Extract the Zip file downloaded from Step 4.
7. Copy and paste all the files src folder, pom.xml, etc in to the SalesforceCanvasFrameworkSDK folder.
8. Navigate to c:SalesforceCanvasFrameworkSDK in Command Prompt, and enter below commands
a. git submodule init
b. git submodule update
c. git init
9. Now enter the below command.
heroku create
10. It will ask “Press any key to opn up the browser to login or q to exit:” if you haven’t logged in earlier.
Press any key to login. Enter the credentials for Heroku to login.
11. Now enter the below command.
git add -A
12. Now enter the below command.
git commit —m “FirstCommit”
13. Now enter the below command.
git push heroku master
Note: If you face any issues, check the below link
https://developer.salesforce.com/docs/atlas.en-us.platform_connect.meta/platform_connect/quick_start_upload_app_to_heroku.htm
14. Go to https://dashboard.heroku.com/apps.
15. You will see your App. Get the App Name.
16. Replace the App name(appName) and build your app URL.
http://appName.herokuapp.com
In my case, the URL is http://lit-hamlet-77941.herokuapp.com
17. Go to App Manager in Salesforce. Click New Connected App. Enter all the required information.
a. Select the Enable OAuth Settings.
b. In the Logo Image URL, enter https://appName.herokuapp.com/images/salesforce.png. In my case, it will be https://lit-hamlet-77941.herokuapp.com/images/salesforce.png.
c. In the Icon URL, enter https://appName.herokuapp.com/examples/hello-world/logo.png. In my case it will be https://lit-hamlet-77941.herokuapp.com/examples/hello-world/logo.png.
d. In the Callback URL field, enter https://appName.herokuapp.com/sdk/callback.html. In my case it will be https://lit-hamlet-77941.herokuapp.com/sdk/callback.html.
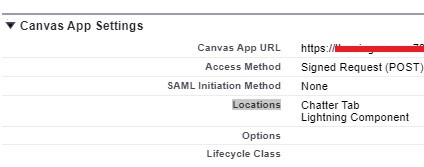
e. In the Canvas App URL field, enter https://appName.herokuapp.com/examples/hello-world/index.jsp. In my case it will be https://lit-hamlet-77941.herokuapp.com/examples/hello-world/index.jsp.
f. In the Access Method field, select Signed Request (Post).
g. In the Locations field, select Chatter Tab.
h. In the Selected OAuth Scopes field, select Access your basic information.
i. Canvas App Settings section, select Canvas
Callback URL:
Callback URL is the endpoint that Salesforce calls back to your application during OAuth process. It is the OAuth redirect URI. Depending on which OAuth flow you use, the URL is typically the one that a user’s browser is redirected after successful Authentication.
18. Click Save button to save the Canvas App. Copy the Consumer Secret.
19. Go to https://dashboard.heroku.com/apps. Open the App. Click Settings. Click Reveal Config Vars. Add the below.
key – CANVAS_CONSUMER_SECRET
value – Consumer Secret from Step 18.
20. Go to “Manage Connected Apps” under Salesforce Setup. Open the Canvas App created. Click Edit Policies. Set Permitted Users to Admin approved users are pre-authorized. Click Save button. Under Profiles section select System Administrator.
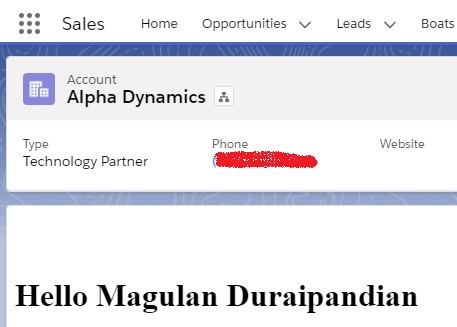
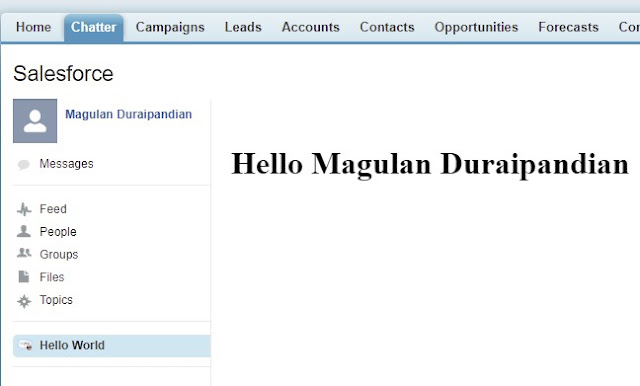
21. Go to Chatter tab in Salesforce classic.
22. Click the Canvas App link on the left side to view it.
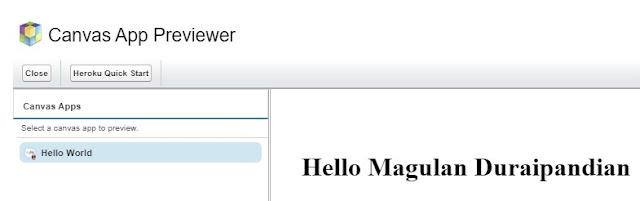
To check in Canvas App Previewer:
1. Go to “Canvas App Previewer” in Salesforce Setup.
2. Click the Canvas app to preview.
To show in the Lightning Record page:
1. Create an Aura Component.
<aura:component implements="flexipage:availableForRecordHome,force:hasRecordId" access="global" >
    <lightning:card>
        <force:canvasApp developerName="Hello_World"/>
    </lightning:card>
</aura:component>
2. Add the component to the lightning record page.
3. In the Connected App, under Locations, add Lightning Component.