

Select the Salesforce orgs and your user credential in Salesforce Org User in which you will be developing and modifying the components.
Update My Version Control Mappings

Select the repositories in which you will be committing and merging the components and the ALM.
Note:
1. Click Test Connection button to test the connection.
2. Select the correct key configured for successful connection.
New component commit to Version Control
Let’s see how to commit new Apex Class.
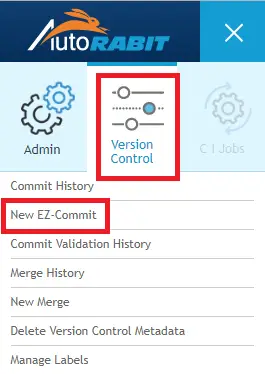
1. Select Version Control.
2. Select New EZ-Commit.
3. Select Salesforce org(Source), Salesforce Org Author(User), Repository(SVN) and Branch(SVN Branch).
4. Select Retrieval Type.
Retrieval Type
a. Fetch Changes: Fetch Changes will allow you to see live status updates about the changes that are being fetched from a Salesforce Org.
b. Select Metadata Members: Additional Metadata allows you to select the Metadata Members from Salesforce Org and commit them. When multiple users make changes to metadata, the last modified date of a Picklist is not updated by Salesforce, so AutoRABIT provides an option to include pick lists.
c. Re-use Validate Commit Labels: Validate Commit Labels option allows you to reuse the existing validate commit labels. Upon selection, a new dialog box pops-up where you need to select the previously committed label.
Since it is a new component, select “Select Metadata Members”.
Filters are available only when Fetch Changes is selected in Retrieval Type. It will fetch the components changes after the date entered in the From Date field.
5. Under Perform section, choose from the below 3 options:
a. Compare Changes: Compares the metadata between the source and destination Org before committing
b. Validate Changes: Validates the changes before committing to ensure the commit will succeed
c. Commit (Without Validation): allows only to commit to Version Control System
Since it is a new component select “Commit”.
6. In Post Commit, select Update ALM Workitem Status. This will update the status of the JIRA ticket.
7. Click Next button.

8. Select Apex Class.
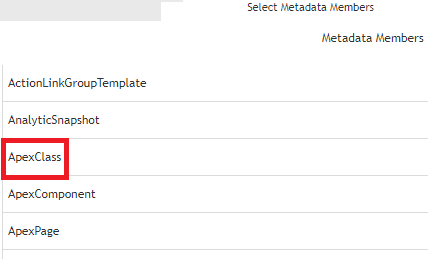
9. Select the new Apex Class. Click Next button.
10. Click Finish button to Commit.
Modified component commit to Version Control
1. Select Version Control.
2. Select New EZ-Commit.
3. Select Salesforce org(Source), Salesforce Org Author(User), Repository(SVN) and Branch(SVN Branch).
4. Select Retrieval Type.
Since you know the modified component, select “Select Metadata Members”.
5. Since it is a existing component select Compare Changes and Validation of Changes(Before Commit).
6. Click Diff to see the difference.
7. If you want to validate the deployment with Salesforce org, select Validate Deployment and the Salesforce org.
8. Enter Validation Settings and click Next button.
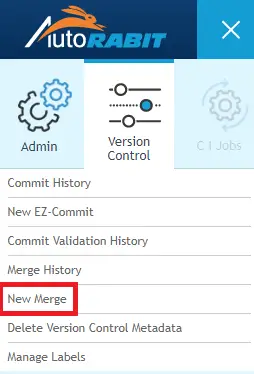
Merging New component to the repository
1. Select New Merge.
2. Select the Repository.
3. Select From Branch and To Branch.
4. Select Merge Type.
a. Entire Branch: You can merge an entire branch to a different Branch
b. Single Revision: You can merge a Single Revision from the Commits you have performed
c. Commit Labels: You can select the Commit Labels created while committing to Version Control System.
d. Release Labels: You can select the Release Labels created using the committed Revisions as well as the Labels.
5. Select Conflict Resolution Strategy.
a. Manually resolve conflicts: You can resolve the conflicts manually in the merge screen
b. Choose file from source: Allows you to choose from source to resolve the conflicts
c. Choose file from destination: Allows you to choose from destination to resolve the conflicts
7. Click Dry Run, to validate the merge. The label is displayed in the Merge History page as Merged_Not_Committed.
Or
Click Merge, and the label is updated in the Merge History page. The Merge reports gets generated and the same gets triggered to the given mail id.
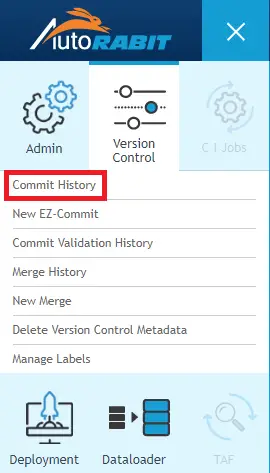
To View Commit History
Go to Version Control –> Commit History.
Existing Component Merge
1. Go to New Merge.
2. Select From and To Branches.
3. Select Merge Type and Conflict Resolution Strategy.
4. Enter Merge Label Name, Comment and Send Merge Report To(Optional).
5. Go to Merge History to find the conflicts.